As you might remember, we wrote a post about our two new wax extractors last year. Well, in our ongoing quest for perfection, we think we’ve found the best extraction yet! Say hello to our new solar wax extractor!
Built by my wonderful coworker Emily, this extractor is perfect because it doesn’t use any energy other than from the sun! And it’s so simple to make and easy to use that anyone can try it!
We grew a bit disenchanted with our industrial extractor when we tried to use it to clean some of the comb we pulled from hives that had died over the winter. Normally we would leave the wax for our new packages of bees to start with but this stuff was pretty gnarly—dark, almost black comb full of dead bees that had begun to mold. So for the health of the bees, we pulled out the worst frames and decided to try melting down the wax just to see if we could get anything useful out of it.

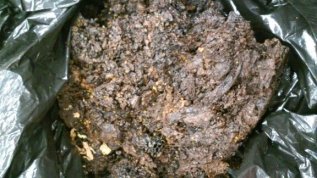 Top: One of our nicer (but still pretty dark) combs harvested from the dead hives. Bottom: That same wax after we’d put it in the extractor for 4 days and it still wouldn’t melt.
Granted, the wax we put into the industrial extractor was not the easiest to work with but we never imagined it would take almost a week for the extractor to do any …errr… extracting. Finally we just gave up and scraped it all out of the extractor.
We did end up rendering the wax by zip-tying it into a t-shirt and putting the t-shirt into a boiling water bath. The wax melted through the shirt into the water, leaving the impurities behind. We then poured the water-wax mixture into milk cartons with the tops cut off. Overnight, the water and wax separate, leaving a bar of wax at the top.
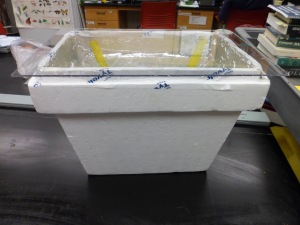
The solar wax extractor works on the same basic principle of using heat to melt the wax through a cloth. It’s basically a solar oven with a straining device inside. Solar wax extractors are easy, low effort, energy-free and cheap to make at home!
Here’s how we made ours:

Supplies:
1 cooler or box (this is the body of the extractor)
Milk carton or other container that will fit inside the cooler/box
Cheesecloth
Aluminum foil
Tape
Sheet of Plexiglass or glass large enough to cover top of cooler/box

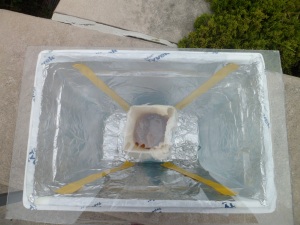
1. Line the cooler with aluminum foil. Use tape to anchor the foil down but not too much; we want the foil to be as reflective as possible to elevate the temperature inside of the extractor.

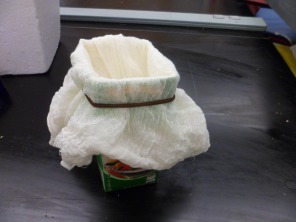
2. Cut the top off of a milk or orange juice carton and tape cheesecloth to the top. Let the cheesecloth sag a bit into the carton so you have space to put the wax into the top.
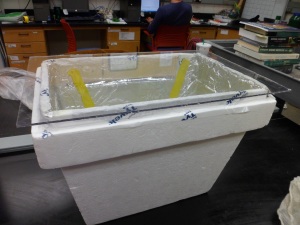
3. If necessary, cut your piece of glass or Plexiglass to fit the top of the cooler. You can use a glass cutter to score a line where you want the cut to be and then gently bend the material until it snaps. As you can see, our Plexiglass hangs over the edge of our cooler a bit but it works just as well.
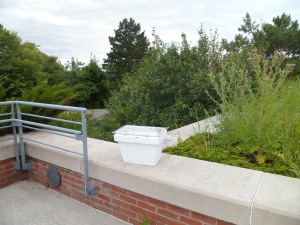
4. Rest your wax on the cheesecloth in the carton and place it inside of your solar extractor. Put the Plexiglass on top and find a sunny place to set the oven for a few hours as the sun does its work! We didn’t find a need to anchor the Plexiglass to the cooler as our piece was pretty heavy but if you think it will be especially windy, try holding the glass down with tape, rope or whatever you have on hand.
5. Come back in a few hours and check on the wax. You can add more to the top and reuse the carton but once the cheesecloth gets too clogged or the carton gets too full, it’s time to switch them out.
Pretty easy, huh? And you have nice clean bars of wax after barely lifting a finger!


